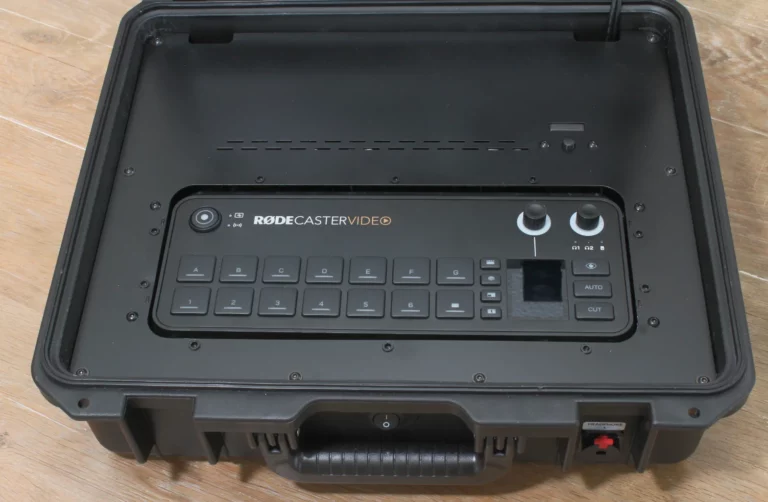
Mounting the Rodecaster Video in the BSS Case
Note: The installation of the Rodecaster Video requires technical understanding and some manual dexterity. Please contact our service department if you need assistance with the installation.
The installation of the Rodecaster Video can be done in just a few steps. In this quick guide, we will show you which steps are necessary. In addition, you will find all steps presented in a compact and clear manner in our assembly video.
Note: The installation of the Rodecaster Video requires technical understanding and some manual dexterity. Please contact our service department if you need assistance with the installation.
The installation of the Rodecaster Video can be done in just a few steps. In this quick guide, we will show you which steps are necessary. In addition, you will find all steps presented compactly and clearly in our adjacent assembly video.
Safety note
Before doing any work on the BSS case, disconnect the mains plug from the socket and also from the case!
When the installation slot is open, do not reach for the installed electronic components. Even if the mains plug is disconnected, these can still carry voltage for a long time and cause an electric shock and/or short circuit.
Please follow the other instructions in our safety guide.
Necessary tool
- Phillips screwdriver; Type: PH, Size: 1
- Optional: soft cotton cloth or similar to avoid scratches or damage to the cover plate during assembly
Preparation
- First, remove all transport locks and protective covers from the recess.
- Use the Phillips screwdriver (PH1) to remove the two C-tensioners (8x M3x12) mounted to the right and left of the recess.
- Optional: place a soft cloth on the edge of the recess to avoid scratches or damage to the top plate.
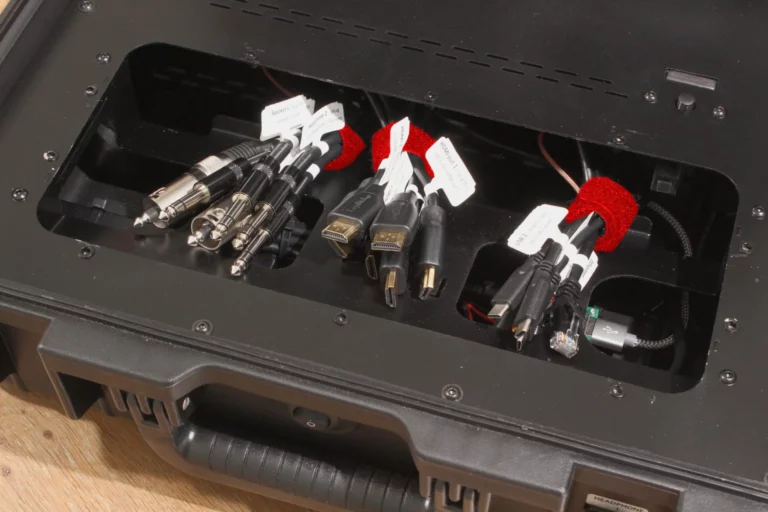
Remove Velcro straps (transport lock) on the three cable bundles and sort the cables as best as possible according to the insertion order on the Rodecaster Video.
Note: When installing the Rodecaster Video yourself, there is an acute risk of tipping over after opening the lid in its end position. Only after installing the Rodecaster Video does the case reach the balanced center of gravity.
Therefore, when opening the lid, hold the case in its horizontal position until the Rodecaster Video is fully installed, with the help of a second person.
Note: When installing the Rodecaster Video yourself, there is a risk of tipping over after opening the lid in its end position. Only after installing the Rodecaster Video does the case reach the balanced center of gravity.
Therefore, when opening the lid, hold the case in its horizontal position until the Rodecaster Video is fully installed, with the help of a second person.
Plug in the cable
- Sort the cables in the installation recess according to the installation order (see back of the Rodecaster video). These are all labeled analogously. Work carefully and avoid cable crossings if possible. The more careful the preparation, the easier it is to install the Rodecaster video.
Note: Do not pull the cables with force under any circumstances, as this could damage them or pull them out of the sockets built into the case.
-
The Rodecaster Video is powered via USB-C with its operating voltage of 19-20V. Only plug this USB-C cable (red labeling) into the port provided for this purpose (at the red power switch). Plugging in under voltage to one of the other USB-C sockets can cause DAMAGE to the Rodecaster video.
Plug in the cable from left to right. All cables are labeled according to the assignment of the Rodecaster sockets.
• Left Wi-Fi antenna cable – Screw connection only hand-tight
• 2x combo cable connectors
• 2x headphones 6.35 mm jack
• 2x speakers 6.35 mm jack
• 2x HDMI -Out
• 4x HDMI-In
• 5x USB-C
• Ethernet RJ45
• USB-C 19V (!) Voltage Connector for Rodecaster Video – Never plug it into the other USB sockets
• Right Wi-Fi antenna cable – Screw connection only hand-tight
- Due to the many cables that are used at the same time, it may be necessary to insert them one by one with slight twisting, piece by piece. In order to make it easier for the HDMI cables to be installed in the housing, it helps to twist the plug of the cables by 180° before plugging them in (see illustration in our video instructions). As a result, the cable loop created in this way fits into the case with less resistance.
The Rodecaster Video is powered via USB-C with its operating voltage of 19-20V. Only plug this USB-C cable (red labeling) into the port provided for this purpose (at the red power switch). Plugging in under voltage to one of the other USB-C sockets can cause DAMAGE to the Rodecaster video.
Plug in the cable from left to right. All cables are labeled according to the assignment of the Rodecaster sockets.
• Left Wi-Fi antenna cable – Screw connection only hand-tight
• 2x combo cable connectors
• 2x headphones 6.35 mm jack
• 2x speakers 6.35 mm jack
• 2x HDMI -Out
• 4x HDMI-In
• 5x USB-C
• Ethernet RJ45
• USB-C 19V (!) Voltage Connector for Rodecaster Video – Never plug it into the other USB sockets
• Right Wi-Fi antenna cable – Screw connection only hand-tight- Due to the many cables that are used at the same time, it may be necessary to insert them one by one with slight twisting, piece by piece. In order to make it easier for the HDMI cables to be installed in the housing, it helps to twist the plug of the cables by 180° before plugging them in (see illustration in our video instructions). As a result, the cable loop created in this way fits into the case with less resistance.
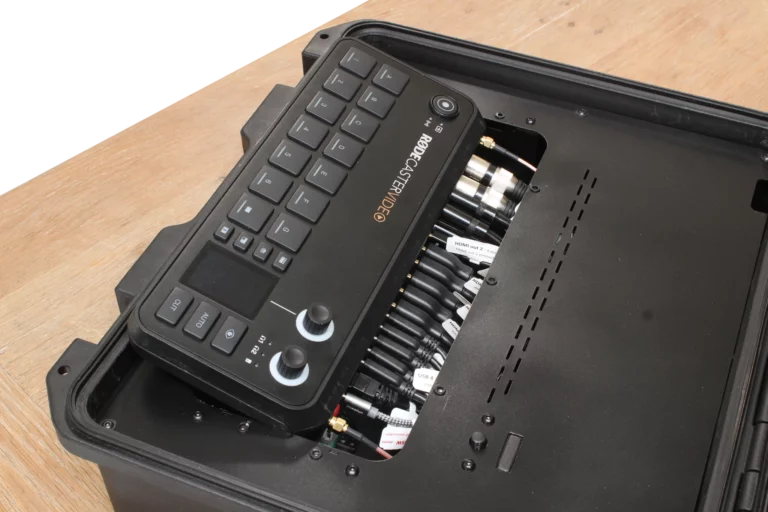
Rodecaster swivel in
- Once all cables have been plugged in and their correct fit has been checked, the Rodecaster Video is swivelled in from above into the recess provided for this purpose and fastened with the included C-rails. The easiest way to do this is to use a simultaneous “immersion and swivel movement” (see video instructions).
Note: Work carefully and under no circumstances press the Rodecaster Video into the recess with high force! If you feel too much back pressure or the cover plate deforms under the pressure of the cables, carefully remove the Rodecaster Video and sort the cables again until it can be inserted into the recess without much counterpressure. You may have to repeat this process several times until the Rodecaster Video finds its pressure-free fit.
Screw
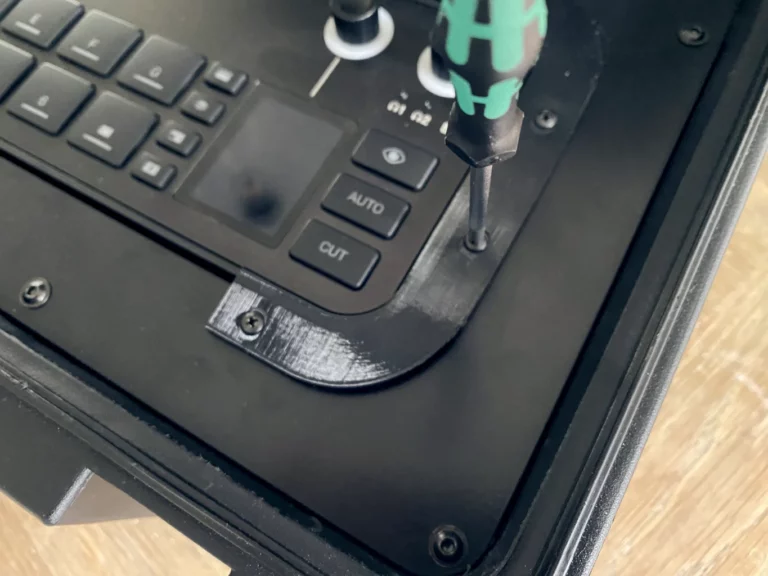
- The C-clamps must be mounted in the correct position (right/left). You will find a marker (R/L) on its underside.
- Place the two C-tensioners on the Rodecaster and screw them together with a Phillips screwdriver, size PH1, with the enclosed screws M3x12 mm (8 pcs.), at first only loose with enough play to bring the Rodecaster into position.
- After both C-tensioners are placed in this way, slide the Rodecaster Video into its center position in the recess on one side under light pressure.
- The C-tensioner on this page must now be able to be placed correctly over the Rodecaster video.
- Hold the C-clamp in position with one hand and fix all screws with a slight tightening torque, max. 0.2 Nm (! only lightly apply).
- Do the same with the other C-tensioner.
Removal of the Rodecaster video from the BSS case
Step-by-step procedure
Tools needed: Phillips screwdriver, size PH 1
- Remove all eight screws on the C-tensioners and remove the C-tensioners.
- Carefully reach into the two recesses to the right and left of the Rodecaster video and lift the device until it can be swung out backwards.
- Disconnect all cable connections from left to right in the order in which they are arranged.
- Take the Rodecaster video out of the case.
Note: Never pull the cables to remove the plugs – this can cause damage!