Depending on the version, the BSS Case for ATEM Mini contains two audio inputs, which are designed either as 3.5 mm stereo jack sockets (Basic) or as 3-pin XLR sockets (Professional). These inputs are unbalanced stereo inputs, analogous to the inputs on ATEM Mini. This can be used, for example, to import the audio signal from a PC or smartphone. The professional case includes two audio adapters (3.5 mm stereo jack to 3-pin XLR plug).
Unbalanced stereo inputs
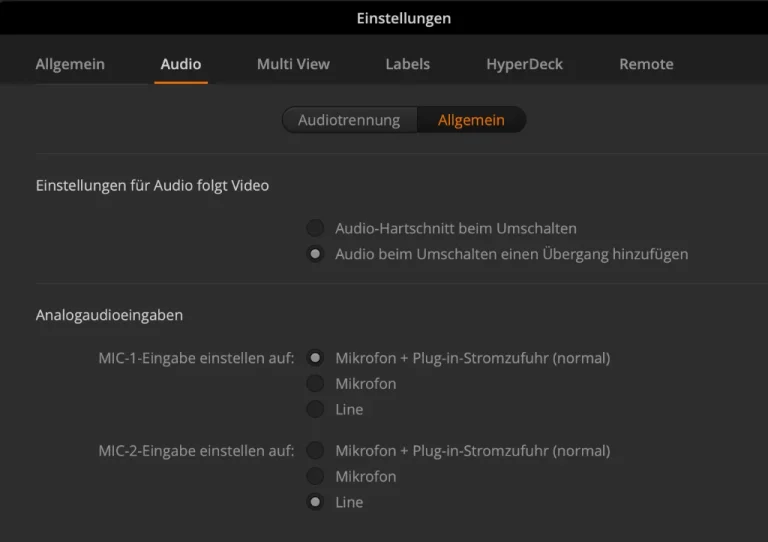
The input sensitivity of the two audio inputs can also be switched to “Mic” (microphone) in the ATEM software (ATEM Software Control Panel). Nevertheless, these inputs are not suitable for the direct connection of a symmetrically wired microphone. In such a case, a (stereo) signal converter (balanced to unbalanced) must be connected upstream. Other methods, such as using audio cables with appropriate jumpers between the pins, can work in individual cases, but often result in ground loops or other audio artifacts that do not lead to the desired result.
Feeding the signal from the unbalanced outputs of an upstream mixer is certainly one of the easiest ways to connect microphones to the ATEM Mini. Our experience shows that, depending on the internal circuitry of the console, it may still be necessary to use a (two-channel) line transformer to decouple ground loops.
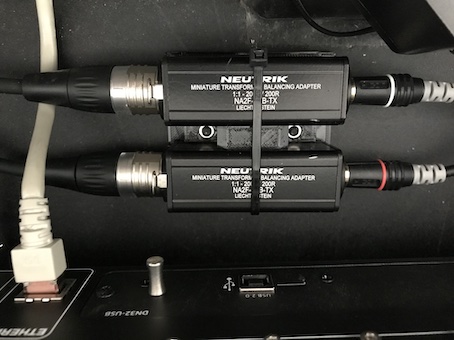
If you are interested in the holder for the two converters used in the illustration, please feel free to contact our service.
The figure shows two Neutrik converters arranged as a stereo pair (balanced to unbalanced signals) with simultaneous galvanic decoupling. This effectively prevents ground loops between the mixer and ATEM Mini.
“Stereometry” for mono signals
If a signal is fed in via a (balanced to unbalanced) line transformer, this can only be present as a mono signal on a stereo channel of the ATEM Mini, depending on the 3.5mm jack plug used and its wiring. A true stereo signal cannot be generated from a mono source, but the mono signal can be “doubled” in the audio settings of the ATEM Software Control Panel. This is output on both channels (right and left). See pictures below.
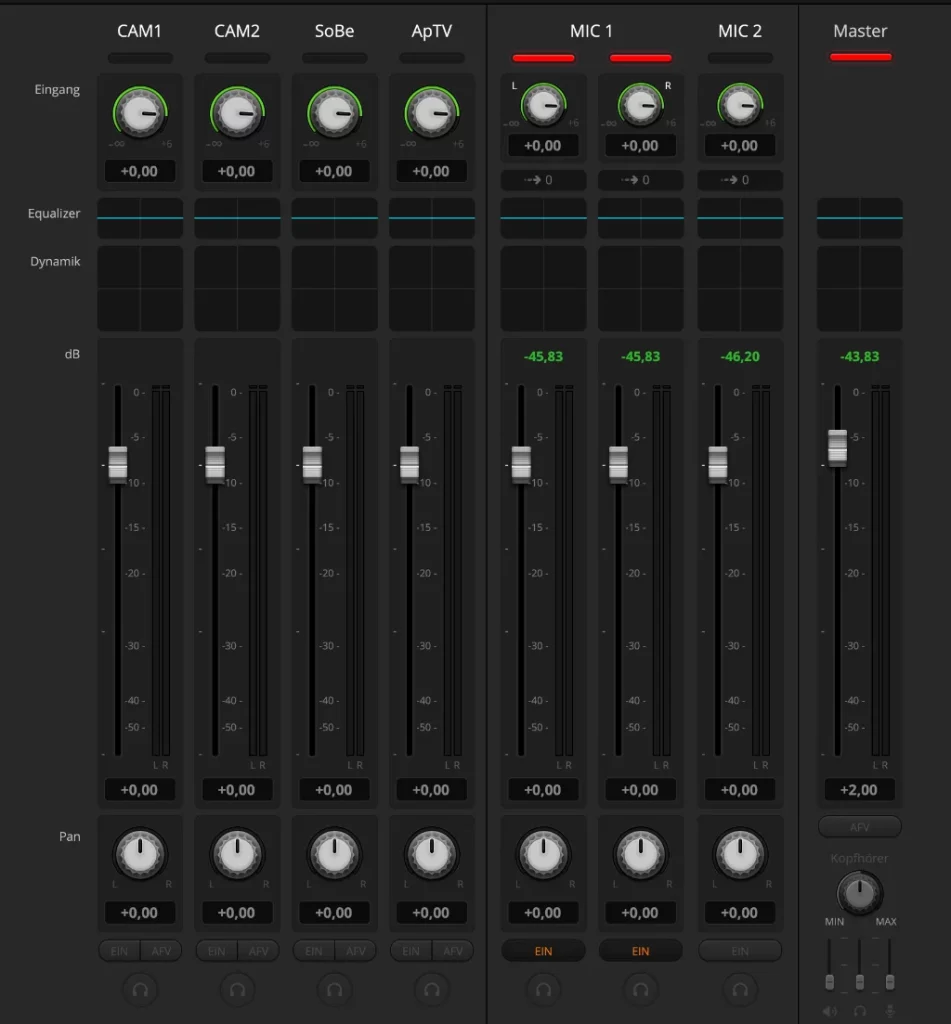
The figures show the settings menu of the ATEM software panel. By activating “Separate audio into separate mono channels” , the corresponding channel (in the example “MIC1”) is doubled into two mono paths.
The two mono paths can now be seen in the audio menu of the software.
our recommendation
- Wherever possible, use hi-fi level, unbalanced stereo signals to feed ATEM Mini’s audio inputs.
- To connect microphones, use an upstream mixer with unbalanced outputs. If necessary, a Y-cable with a 3.5 mm stereo jack (for the basic case) or one with a 3-pin XLR male connector (for the professional case) may be necessary.
- Depending on the internal wiring of the mixer, ground loops can still occur. In this case, please use an appropriate line transformer (galvanic isolation) between the mixer output and the ATEM Mini audio input.
- Alternatively, signal converters (balanced – unbalanced) can be used to feed in individual symmetrical audio sources directly. These external converters are available from specialist retailers.
Audio workaround
Many cameras can process symmetrical signals directly (usually recognizable at the XLR input). The signal is then made available to the ATEM Mini via the HDMI input. This solution also has the advantage that the video and audio from the camera are synchronized. In this video input, the audio signal can be placed firmly in the stream with the “ON” button on the ATEM Mini, even when switching sources.
For more information on ATEM Mini’s audio specifications, please visit the manufacturer’s forum at: https://forum.blackmagicdesign.com
Left
- Simple adapter for balanced/unbalanced conversion with transformer (electrical isolation) Neutrik NA2 F-D0B-TX
- Palmer offers a number of transformers for a wide variety of applications.
Phantom power in the ATEM menu?
The ATEM software menu has even more surprises in store. In addition to the Line and Mic settings, which each adjust the input level (-10 dB / -60dB) of the audio input, there is another setting “Microphone + Plugin Power Supply (Normal)”.
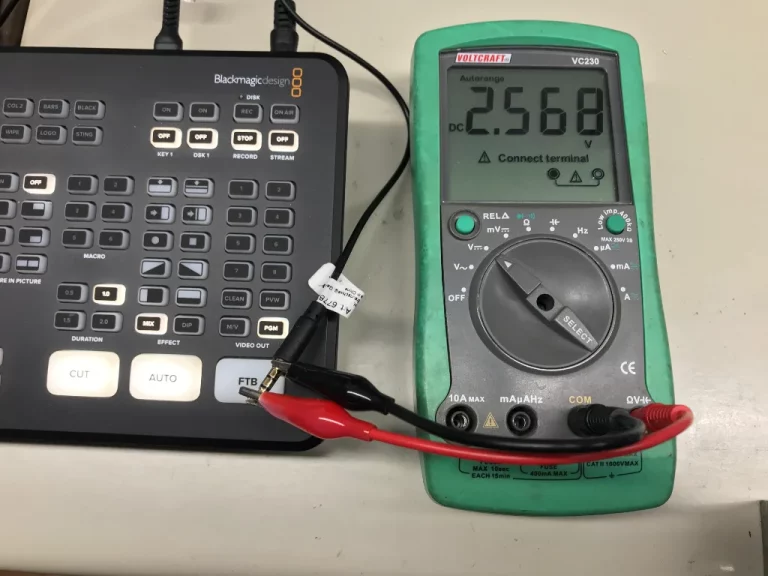
What initially looks like switching on +12V – +48V phantom power for condenser microphones turns out to be a low voltage of +2.5V when measured. This is a necessary operating voltage for small microphones such as Lavelier microphones, but does not replace “real” phantom power.
The fact is: the direct operation of small microphones (electret microphones) can work under the boundary conditions described above (unbalanced output) with the connected power supply. A test before live operation is recommended in any case.
